MuleSoft Technical Guides

ACM (Anypoint Community Manager) Installation
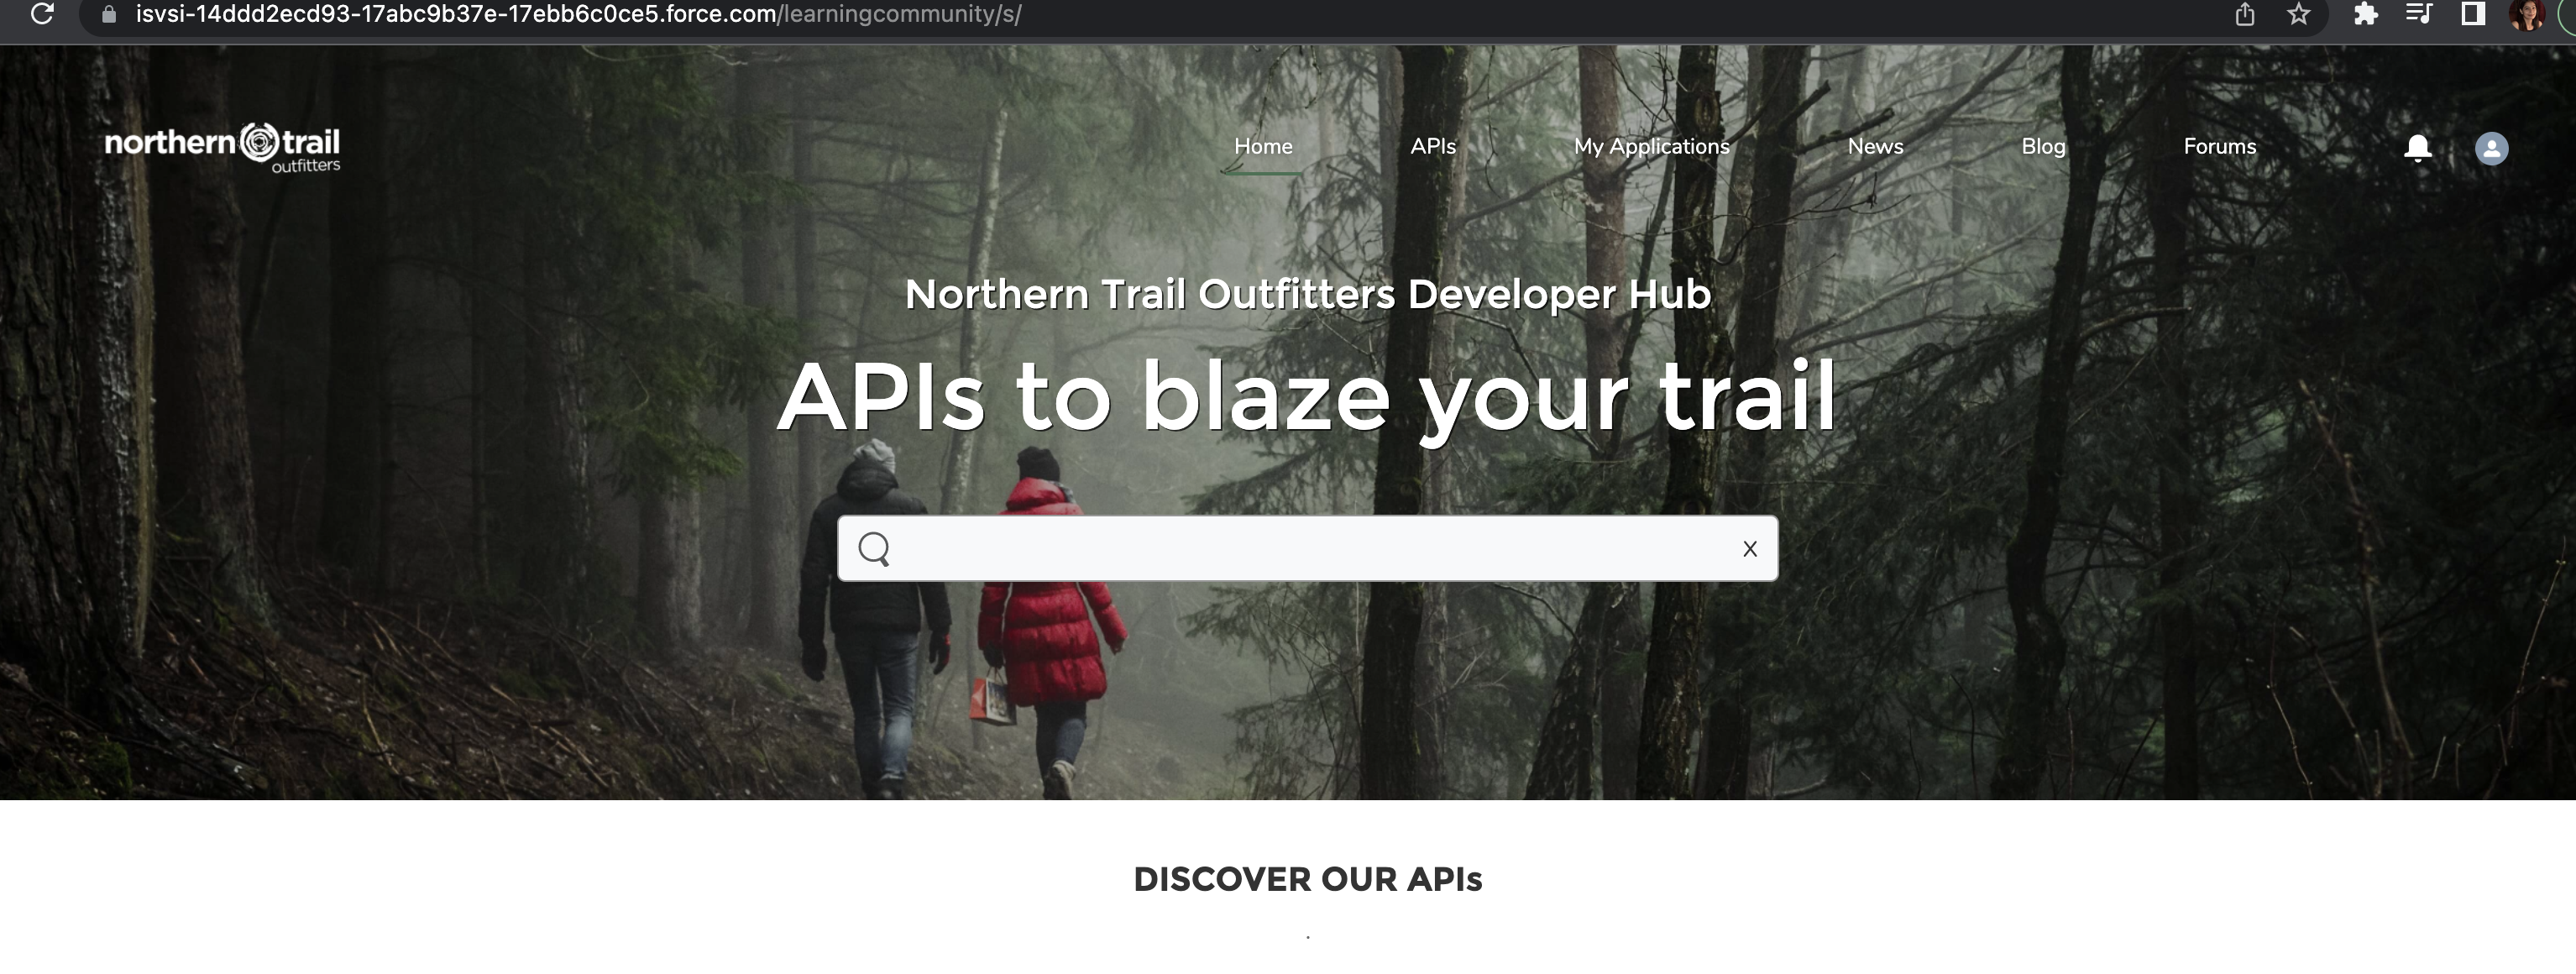
ACM delivers capabilities on the Anypoint Platform that will be able to achieve the dev portal into a personalized digital experience, promotes organization and API Portals, and improve the collaboration between developers, partners, and employees. ACM can transform Anypoint Exchange into a personalized digital experience for various stakeholders.
It can build a portal with pre-configured and out-of-box templates with customization in a few minutes. It provides exceptional features like forums, emails, blogs, chat, and case management.
Installation Steps:
- Prerequisites.
- Install Anypoint Community Manager.
- Create a community
- Activate and Publish a community
Prerequisites:
- Required entitlement to use the Anypoint Community Manager on the Anypoint Platform.
- Required specific roles and permissions in Anypoint Platform and Salesforce.
- Salesforce has a custom subdomain configured to establish secure connectivity with the Anypoint Platform.
- Identity Provider setup has to establish on Salesforce if we don’t have it in MuleSoft. (IDP: An identity provider is a trusted provider that enables a customer to use single sign on to access other websites)
Install Anypoint Community Manager:
- First, check if you have enabled the apiCommunitymanager property is set to true on your Anypoint platform credentials by below clicking on the link after log-in (https://anypoint.mulesoft.com/accounts/api/profile)

2. Make a note of Organization domain id i.e. Anypoint Domain Name which is later used in the creation of connected apps within the Salesforce. (AccessManagement> Organization> Organization domain).
3. Signup for a new developer account in Salesforce and check the required roles for installation by Go to Setup> Users>users> edit an existing user

The role is set to CEO.

Check the Salesforce CRM Content User box.
4.Check the custom domain setup in Salesforce for a secure connection between Salesforce and ACM. Go to Setup>Domain>My Domain

Make note of My Domain Name i.e. Salesforce Org Domain Name.
5. Enable digital experience for Salesforce instance and give custom domain name by Setup> Digital Experiences>Settings
6. Create a SAML IDP in Salesforce, if you don’t have already an Anypoint Platform. Go to Setup> Identity Porvider> Enable Identity Provider> Create Self Signed Certificate.
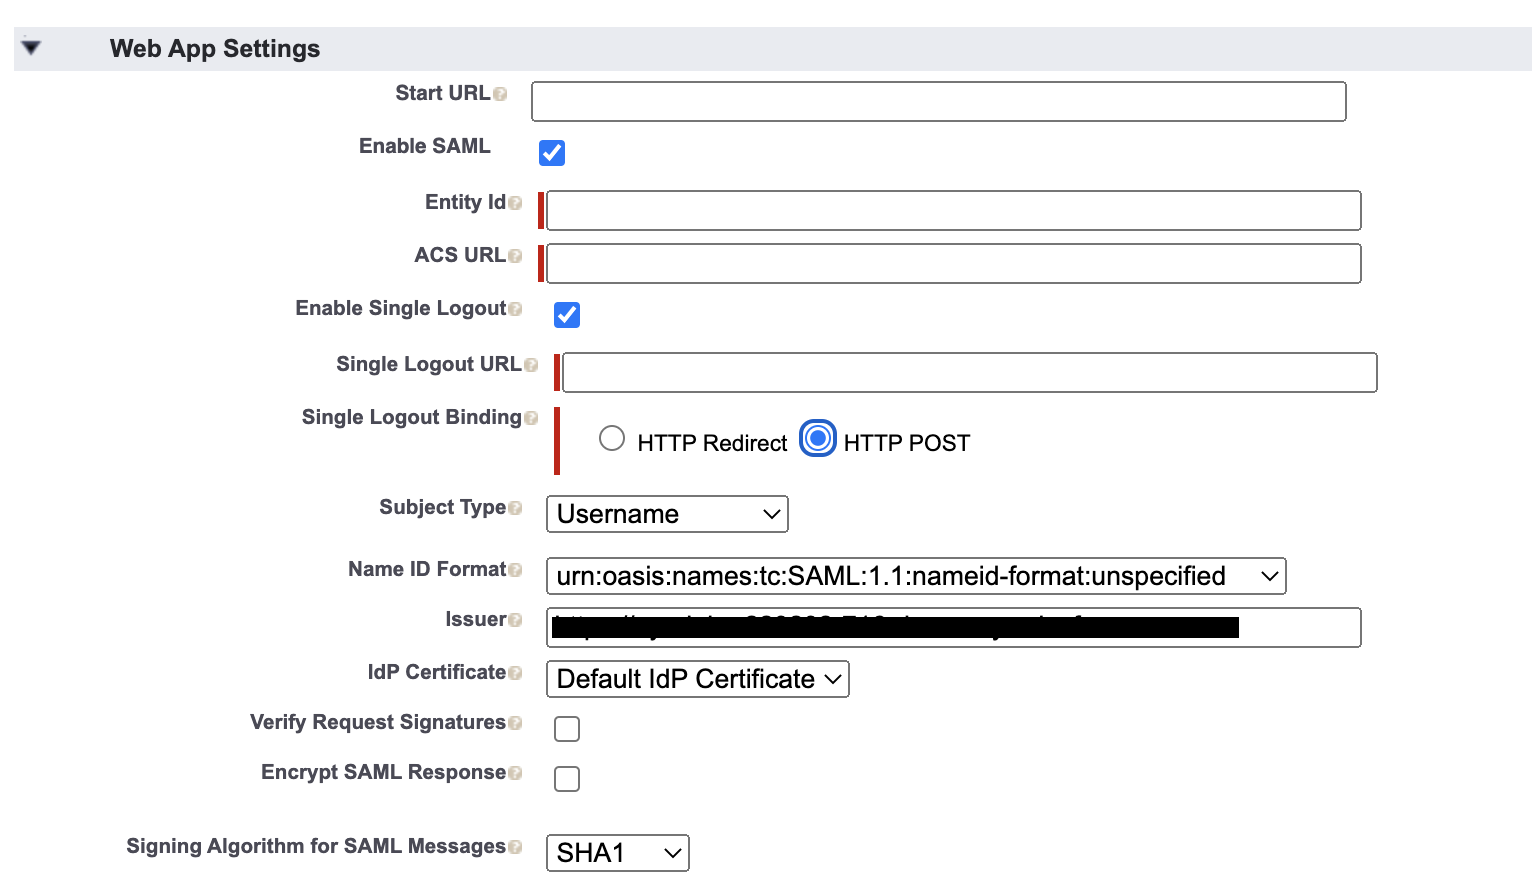
7. Create a new connected app, Go to Setup> App Manager. Create a new connected app.

- Give all the basic details under the new connected app.

- For Start URL under Web App Setting, URL like below, {anypointplatformdomainid} should Organization of Anypoint Platform. https://anypointplatform.com/accounts/login/{anypointplatformdomainid}
- Enable SAML, give a name to the entity id, and make a note of it as it will be used in the Anypoint account.
- ACS URL, give URL https://anypointplatform.com/accounts/login/login/receive-id
- Enable Single Logout and provide Issuer URL, HTTPS://{customdomainname}
- Click on Save
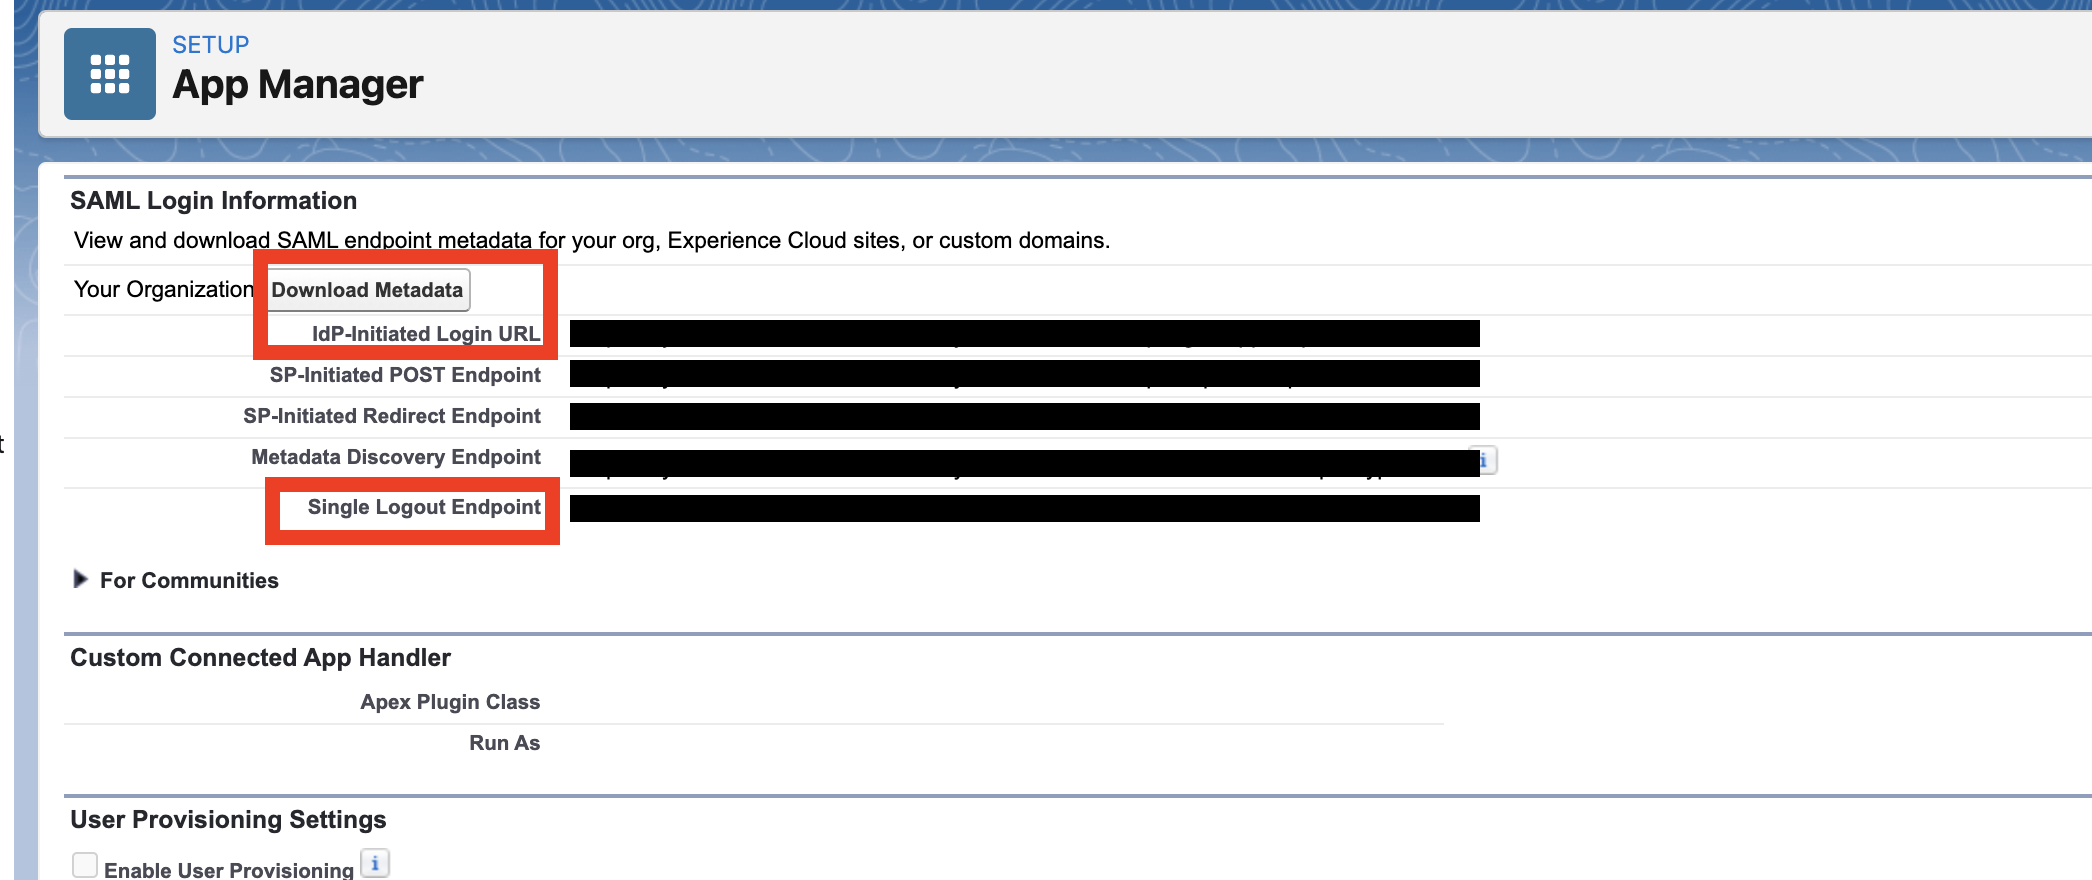
8. Make a note of the SAML configuration that is required for an Anypoint IDP setup. Setup> App Manager>Connected APP> manage. Make a note of the IDP URL and Single logout URL. Get the PUBLIC KEY as well from Download Metadata.
9. For IDP set up in Anypoint Platform, Got to Anypoint Platform account> Access management> Identity Providers> Add identity Provider> SAML 2.0 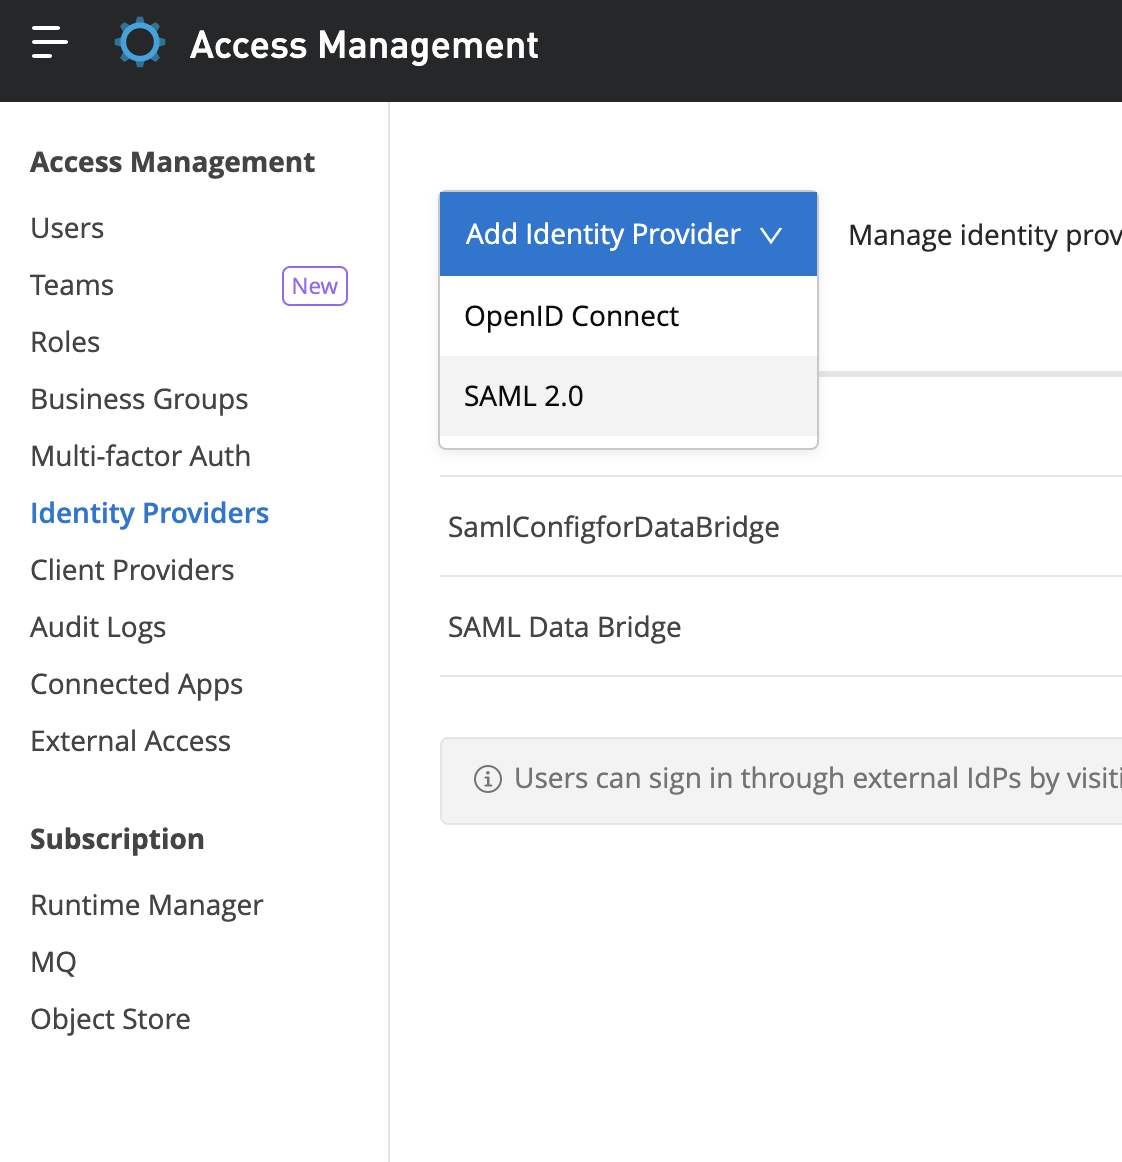
10. Give all the Info in SAML 2.0 that we have saved from the Salesforce instance. Make sure, That you have enabled the SSO checkbox to true.
11. We can install the Anypoint community package that we received from Salesforce representatives. We should receive a URL for ACM package URL.
12. Click on ACM package URL. Click on Install Admins Only> Click on Install.
13. Grant all the permissions and click on continue.
14. Once installation is complete, you can see package details under Salesforce org. Setup> Install Package

Verify the version and status of an installed package
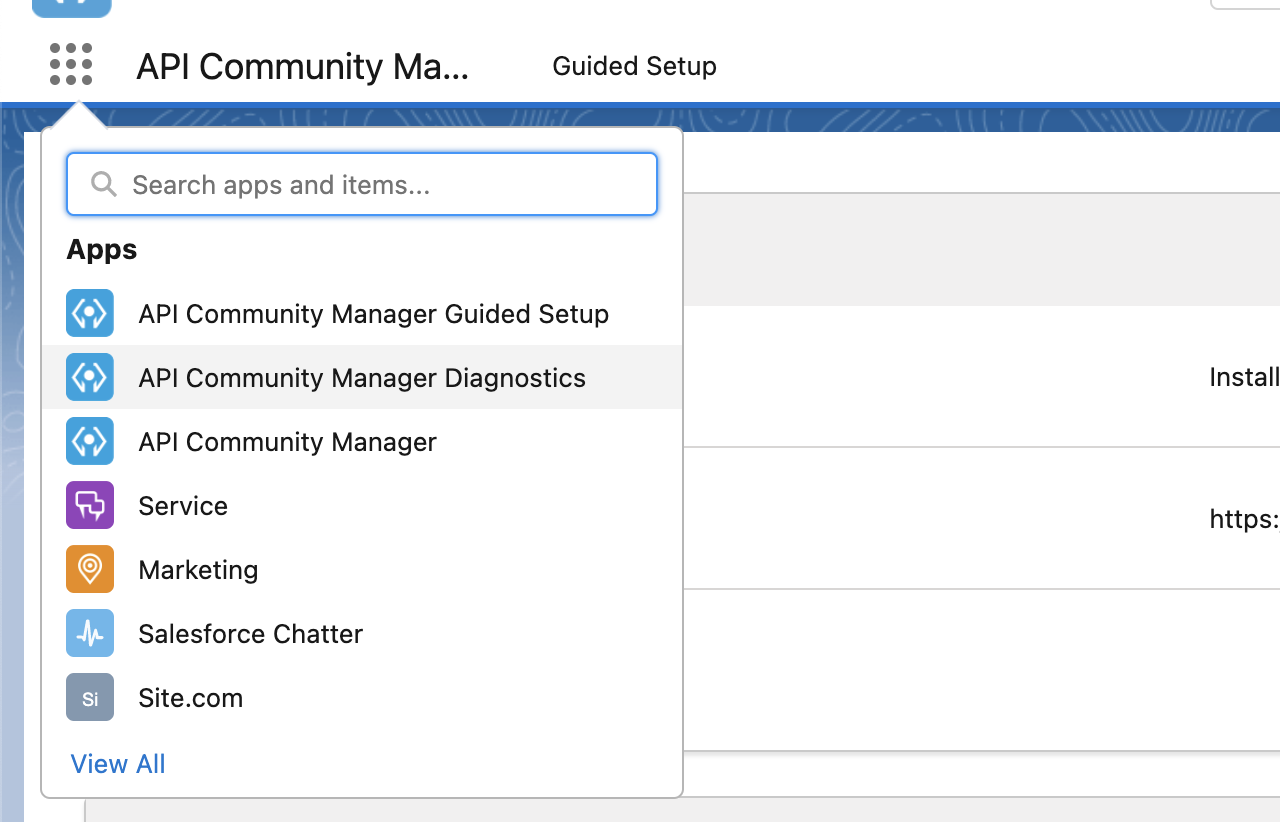
15. Click on APP Lancher> Click on Anypoint Community manager Guided setup.
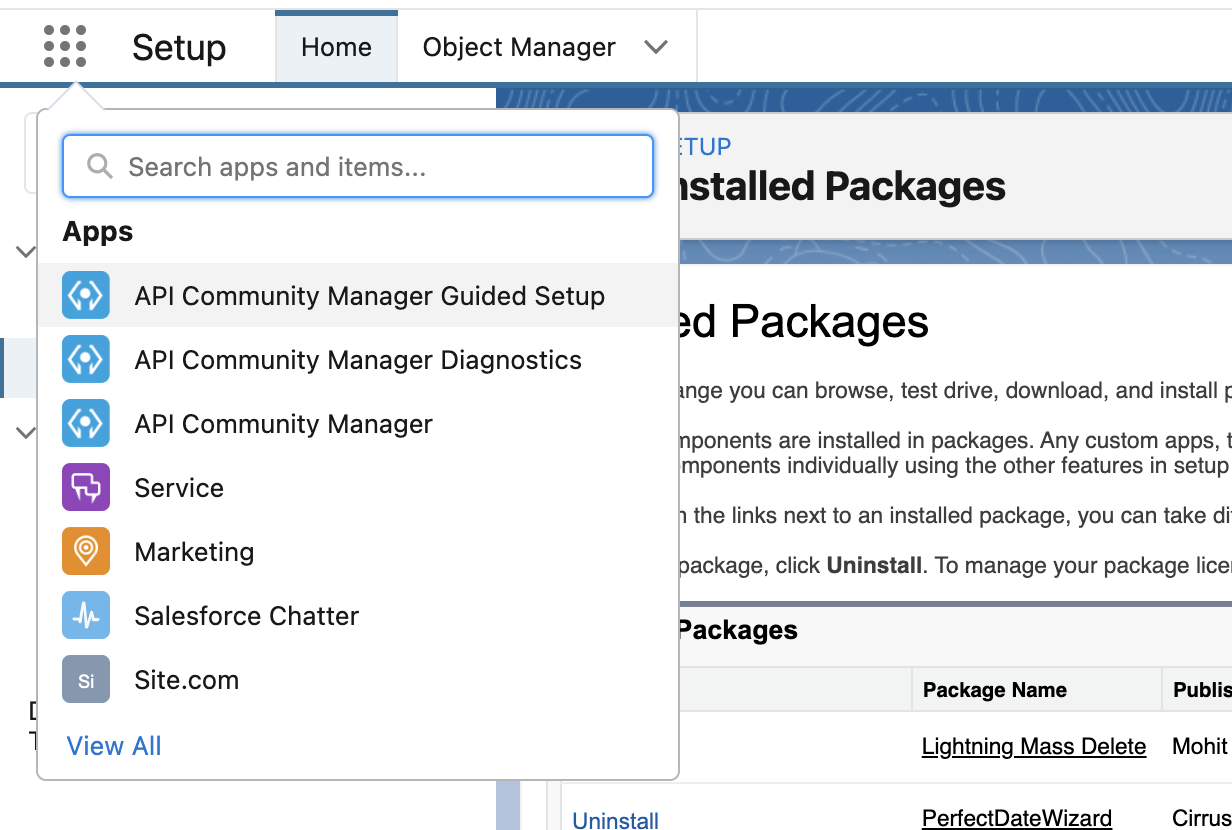
16. Provide the Anypoint Administrator credentials.
17. Click on connect.
18. Once installed, Go to diagnostic.


Create a Community:
- Go to App Launcher> API Community Manager Diagnostics.

- Click on Create a new community.

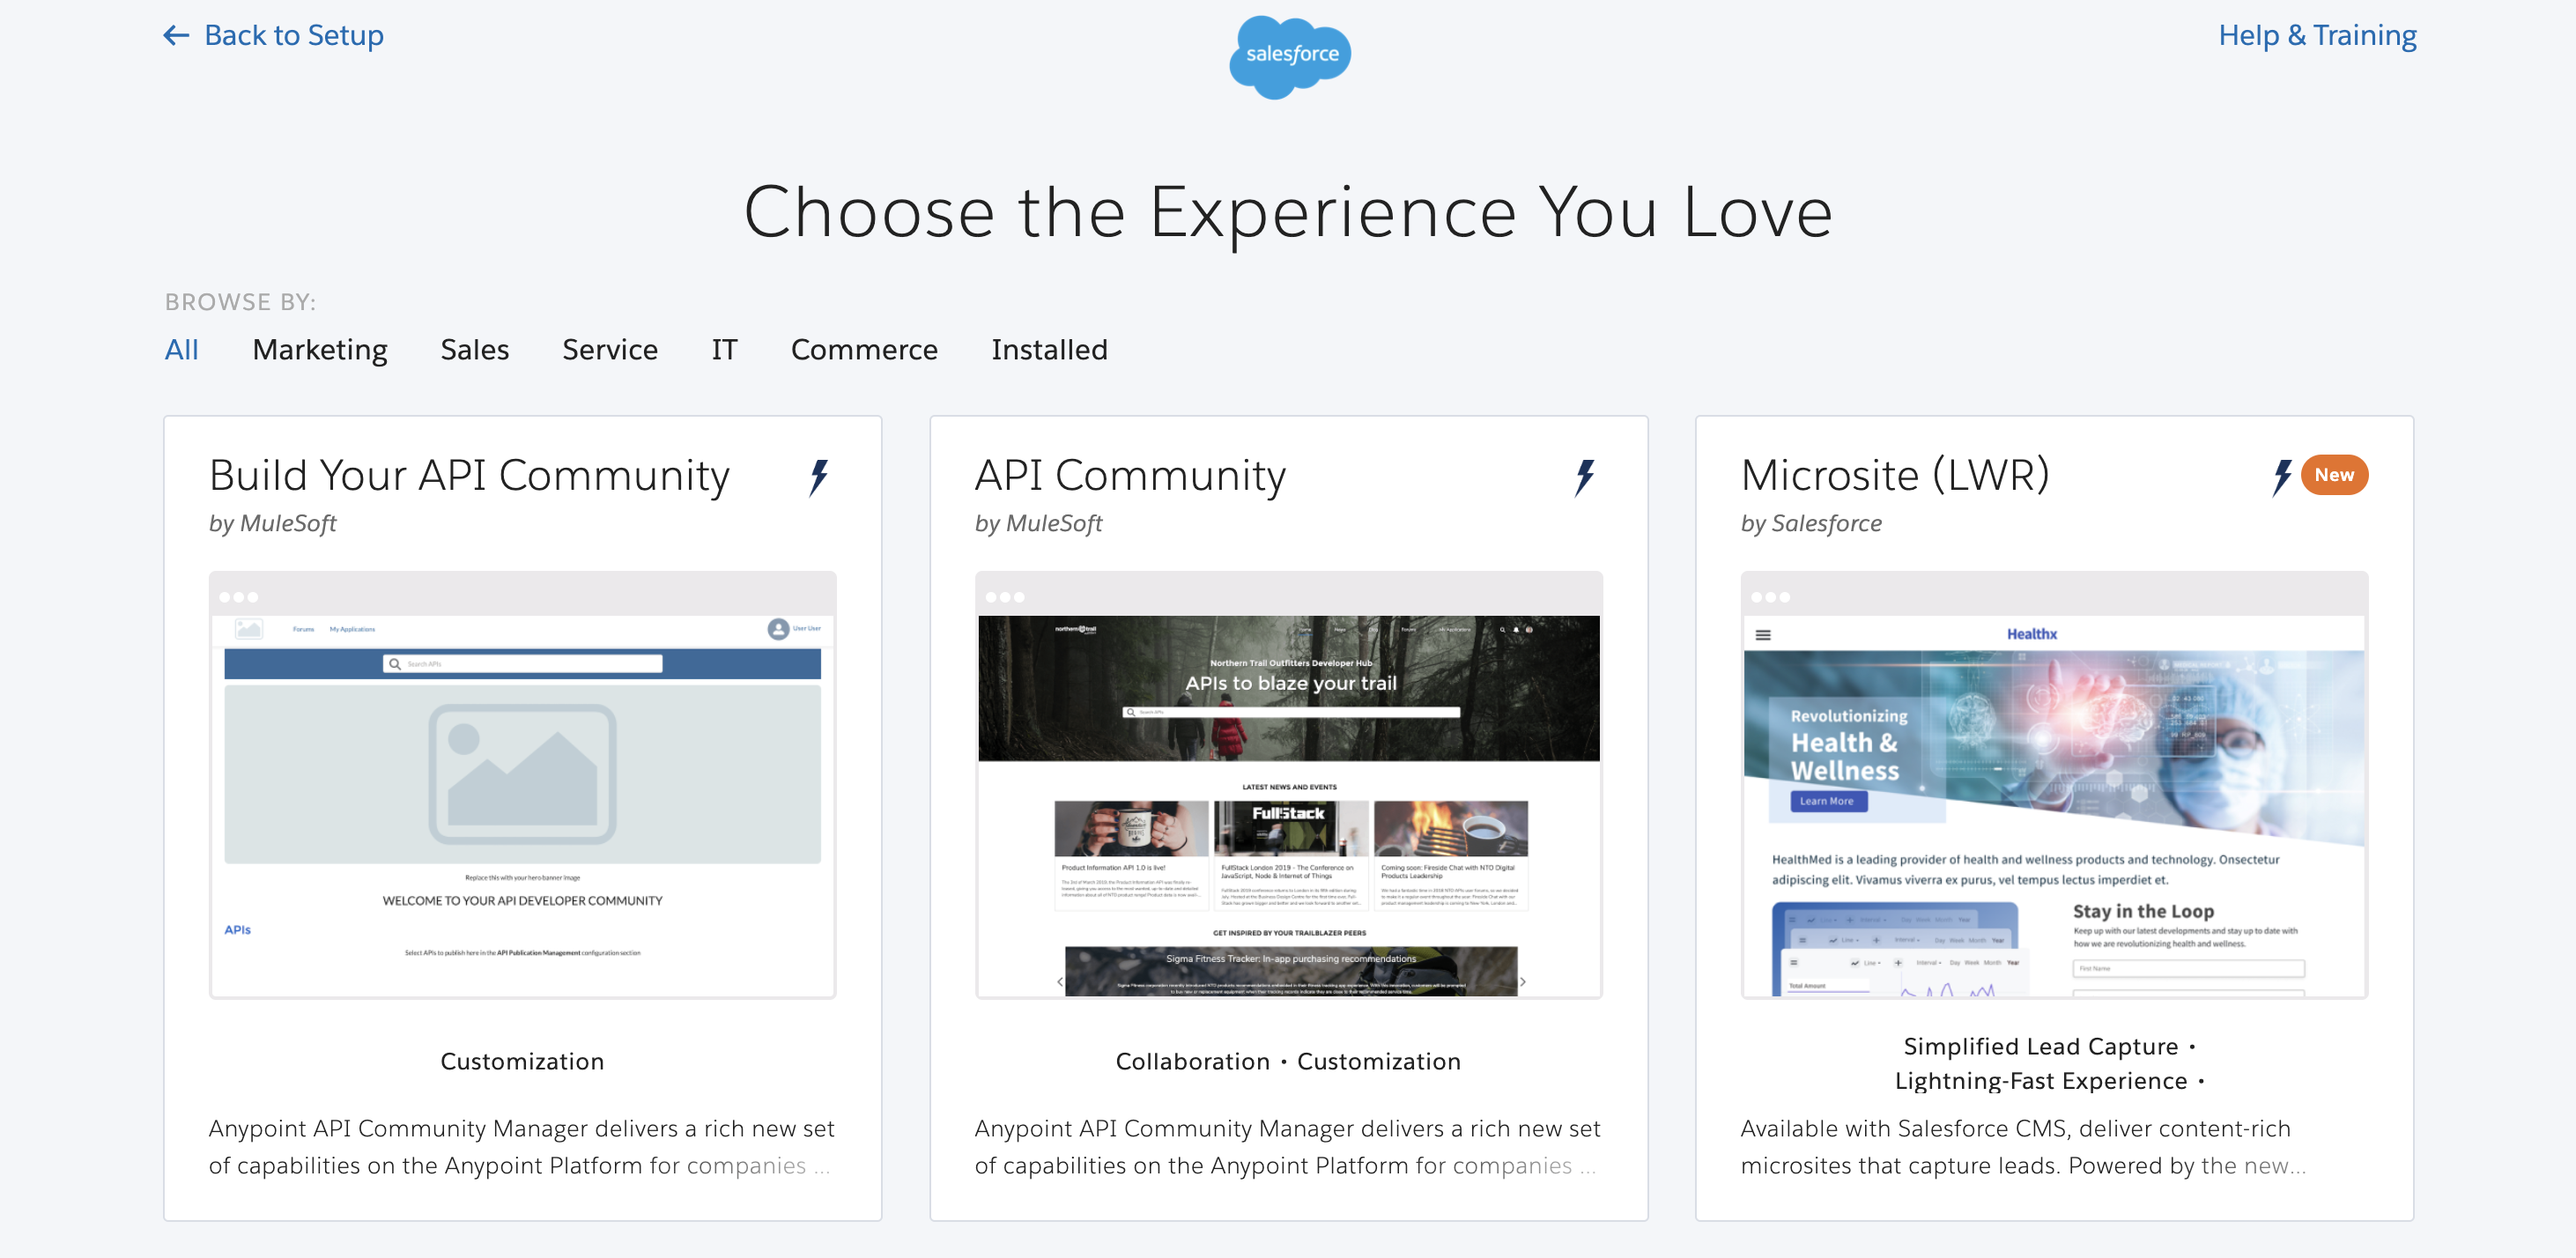
- Create API Community.

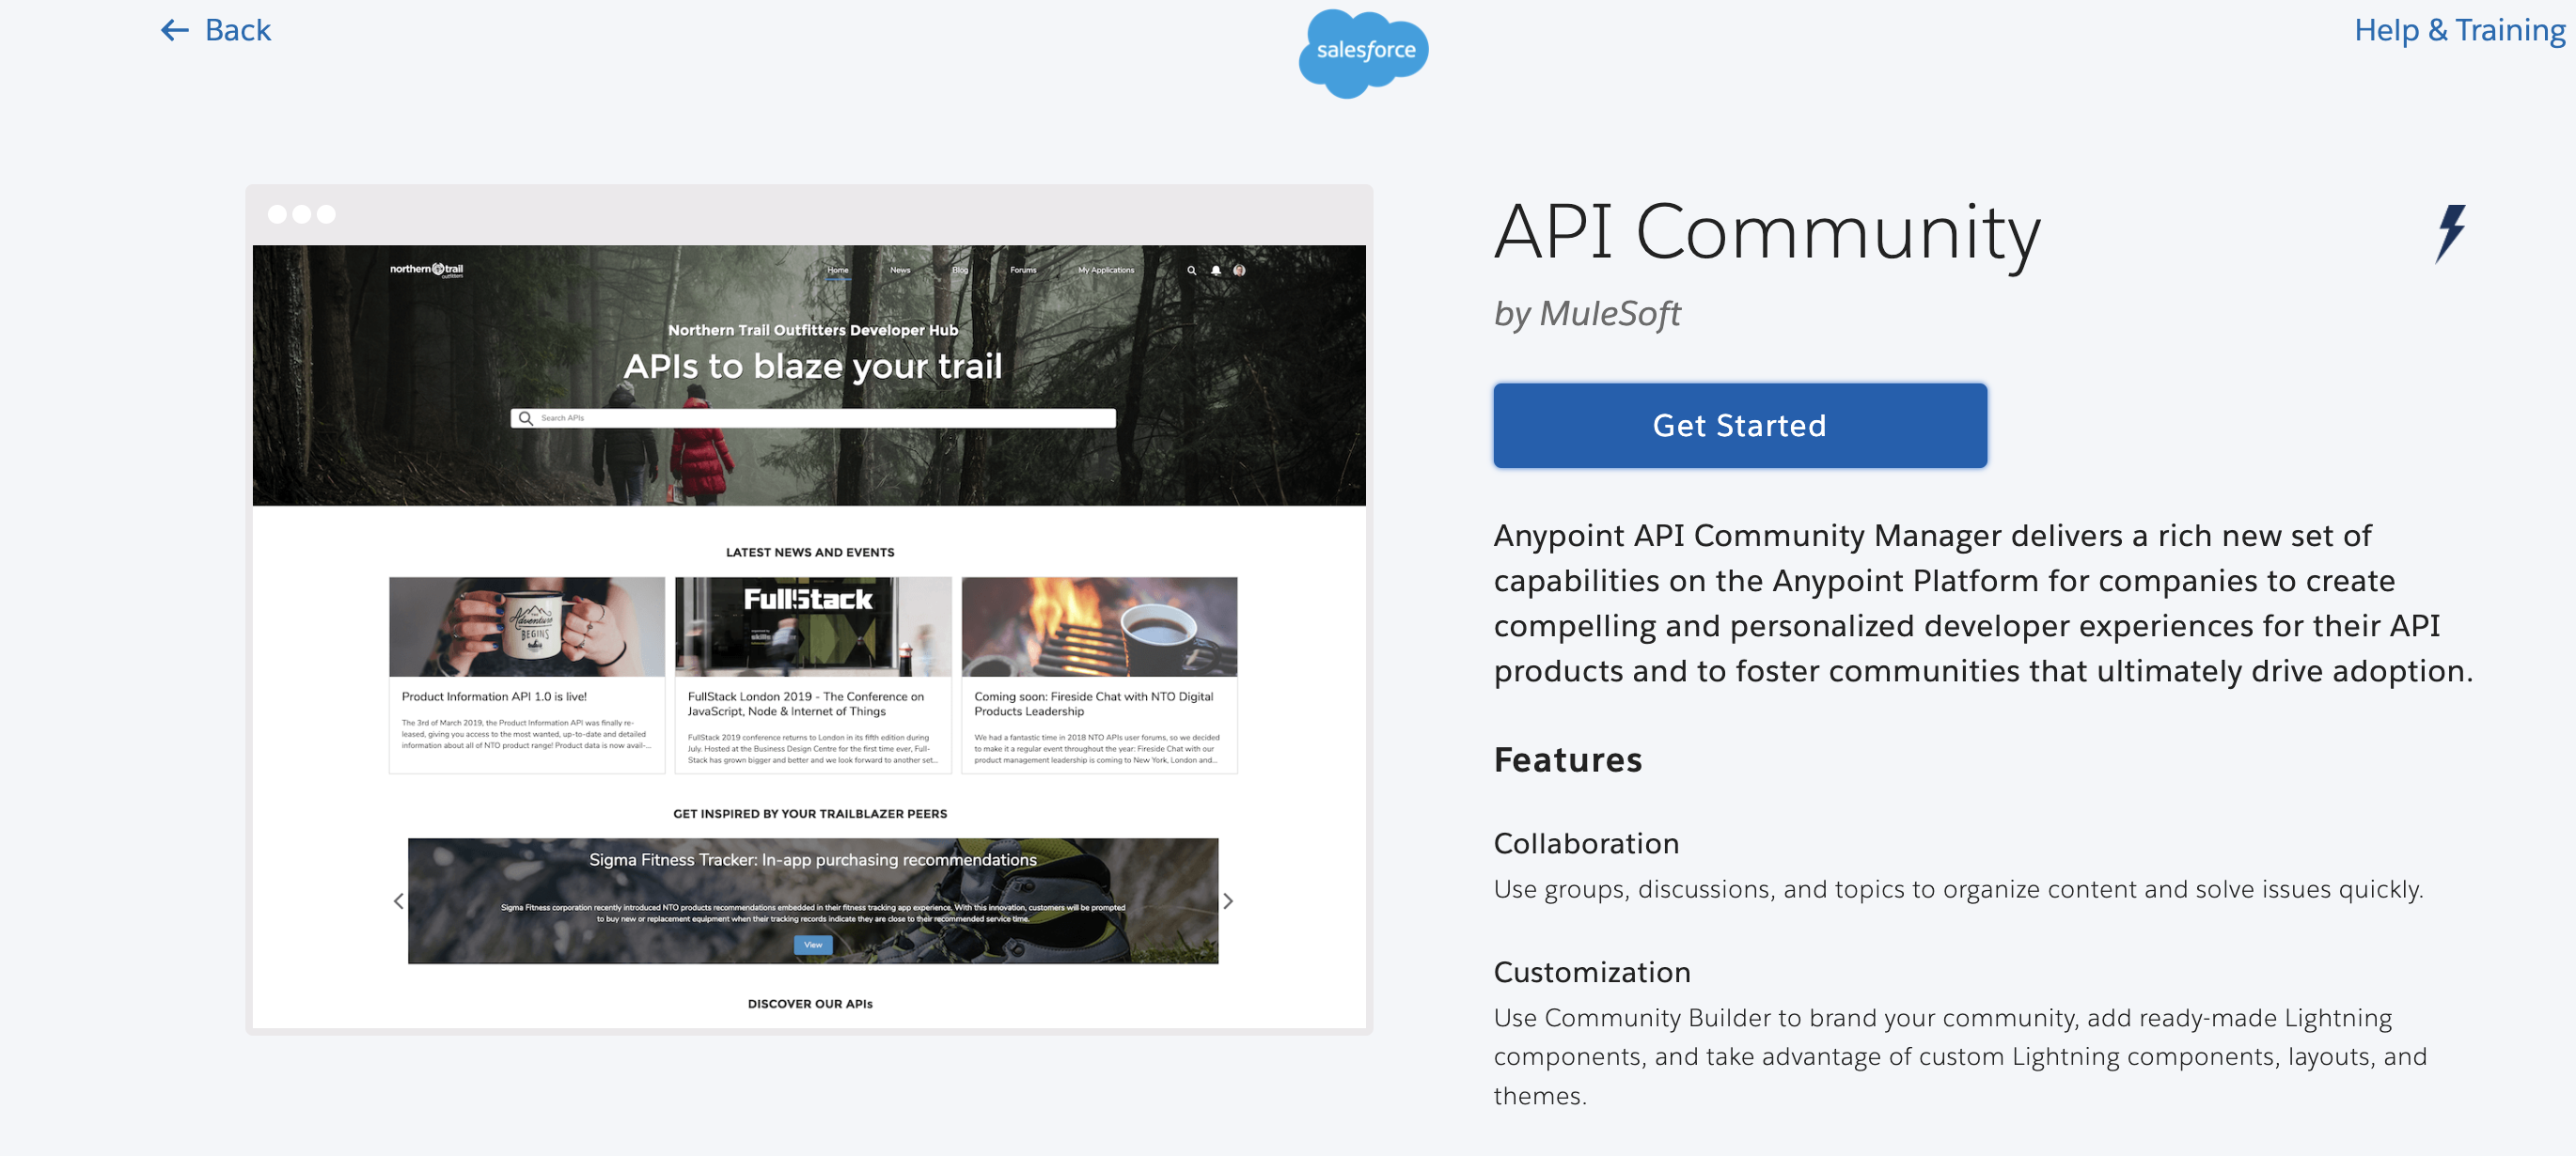
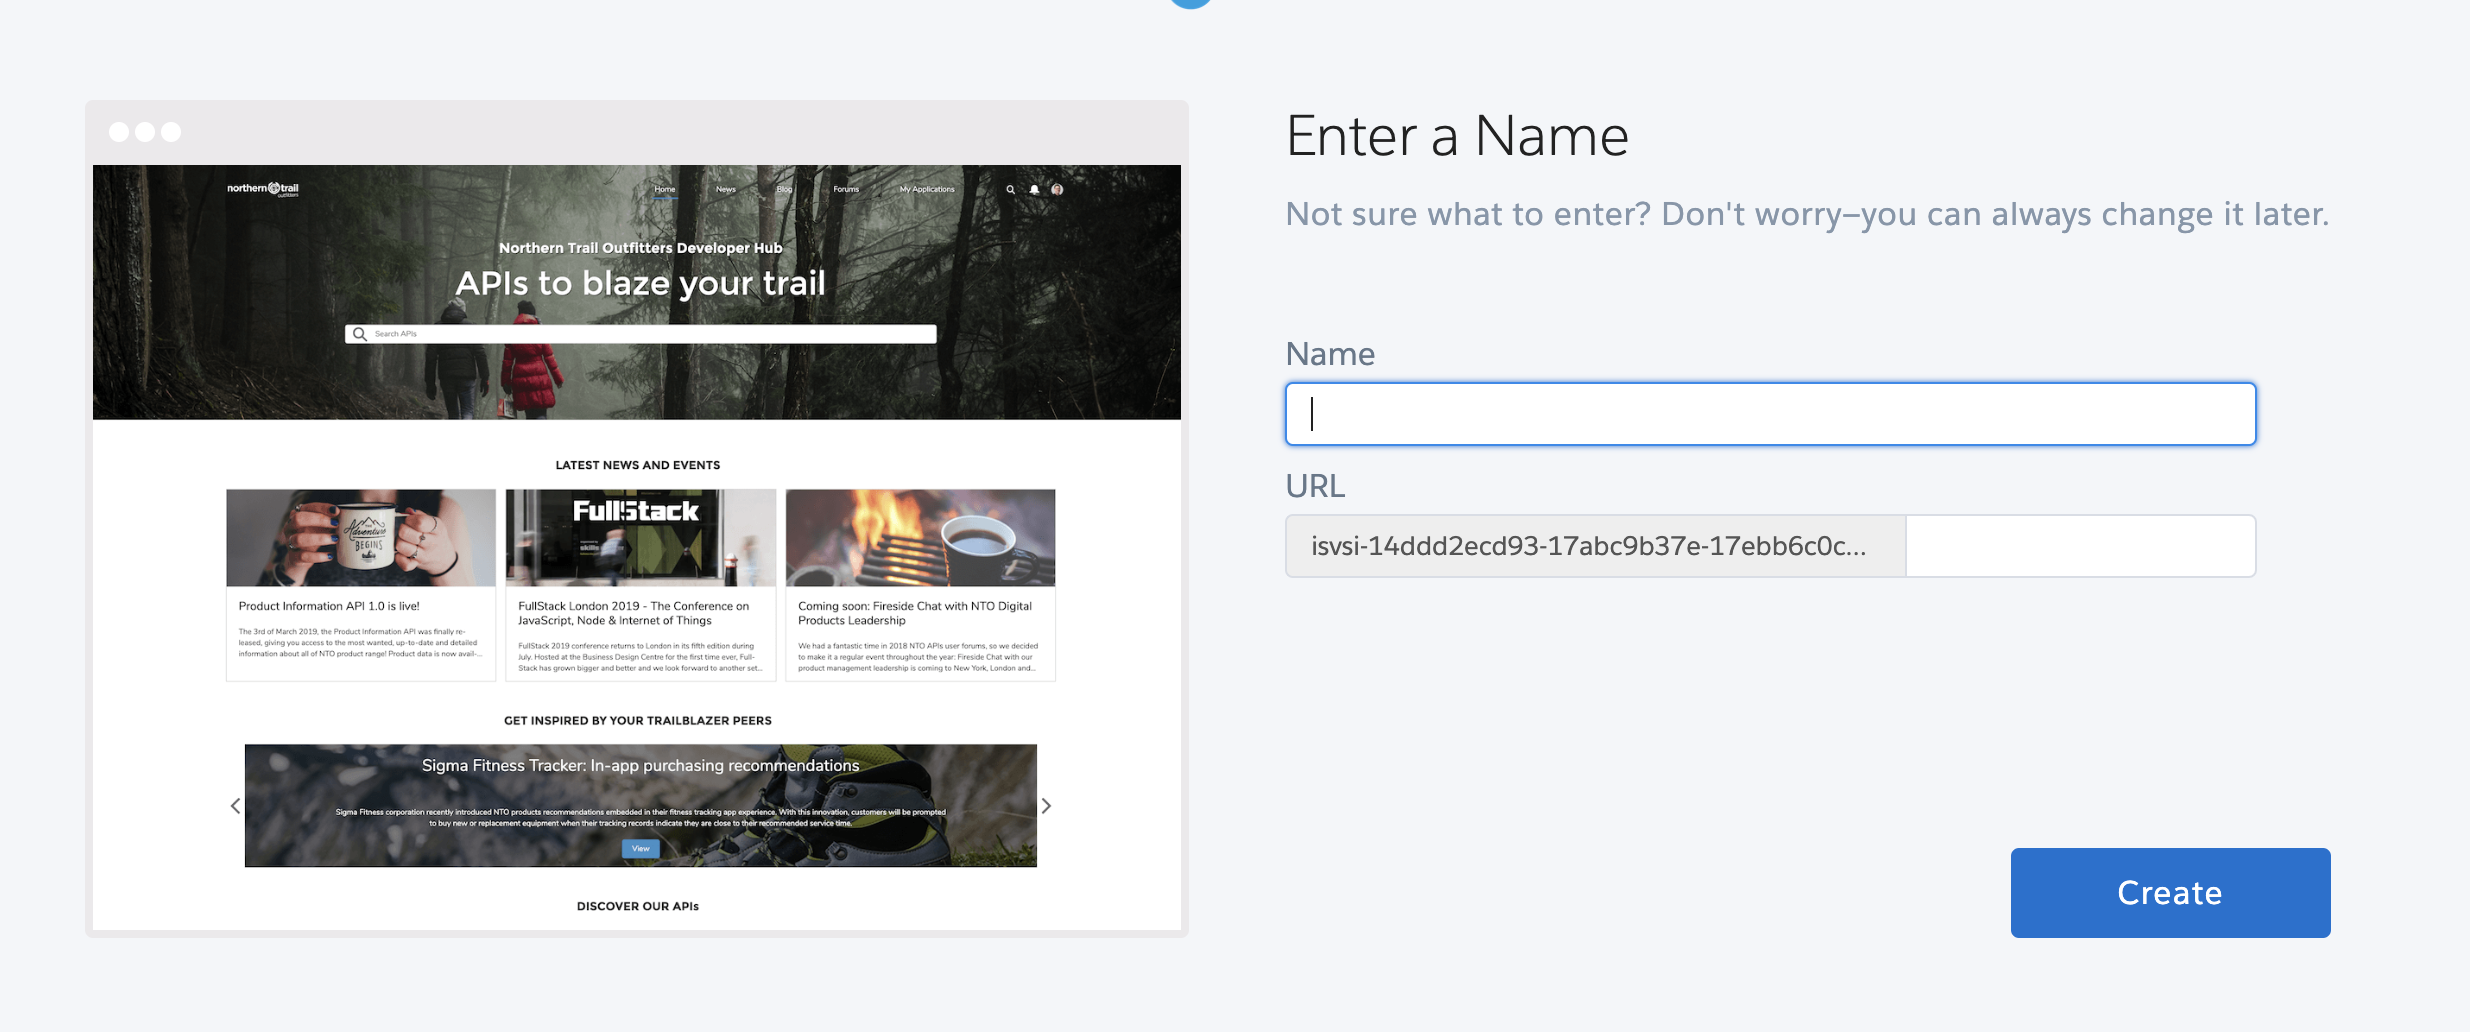
- Choose API Community. Click on Get Started.

- Give the community name.

- After creating the community, you need to create diff profiles for community members and guests to control access and visibility of API on the community page.
- On the Anypoint Platform, create a Team for community users and give them access to Exchange Viewer.
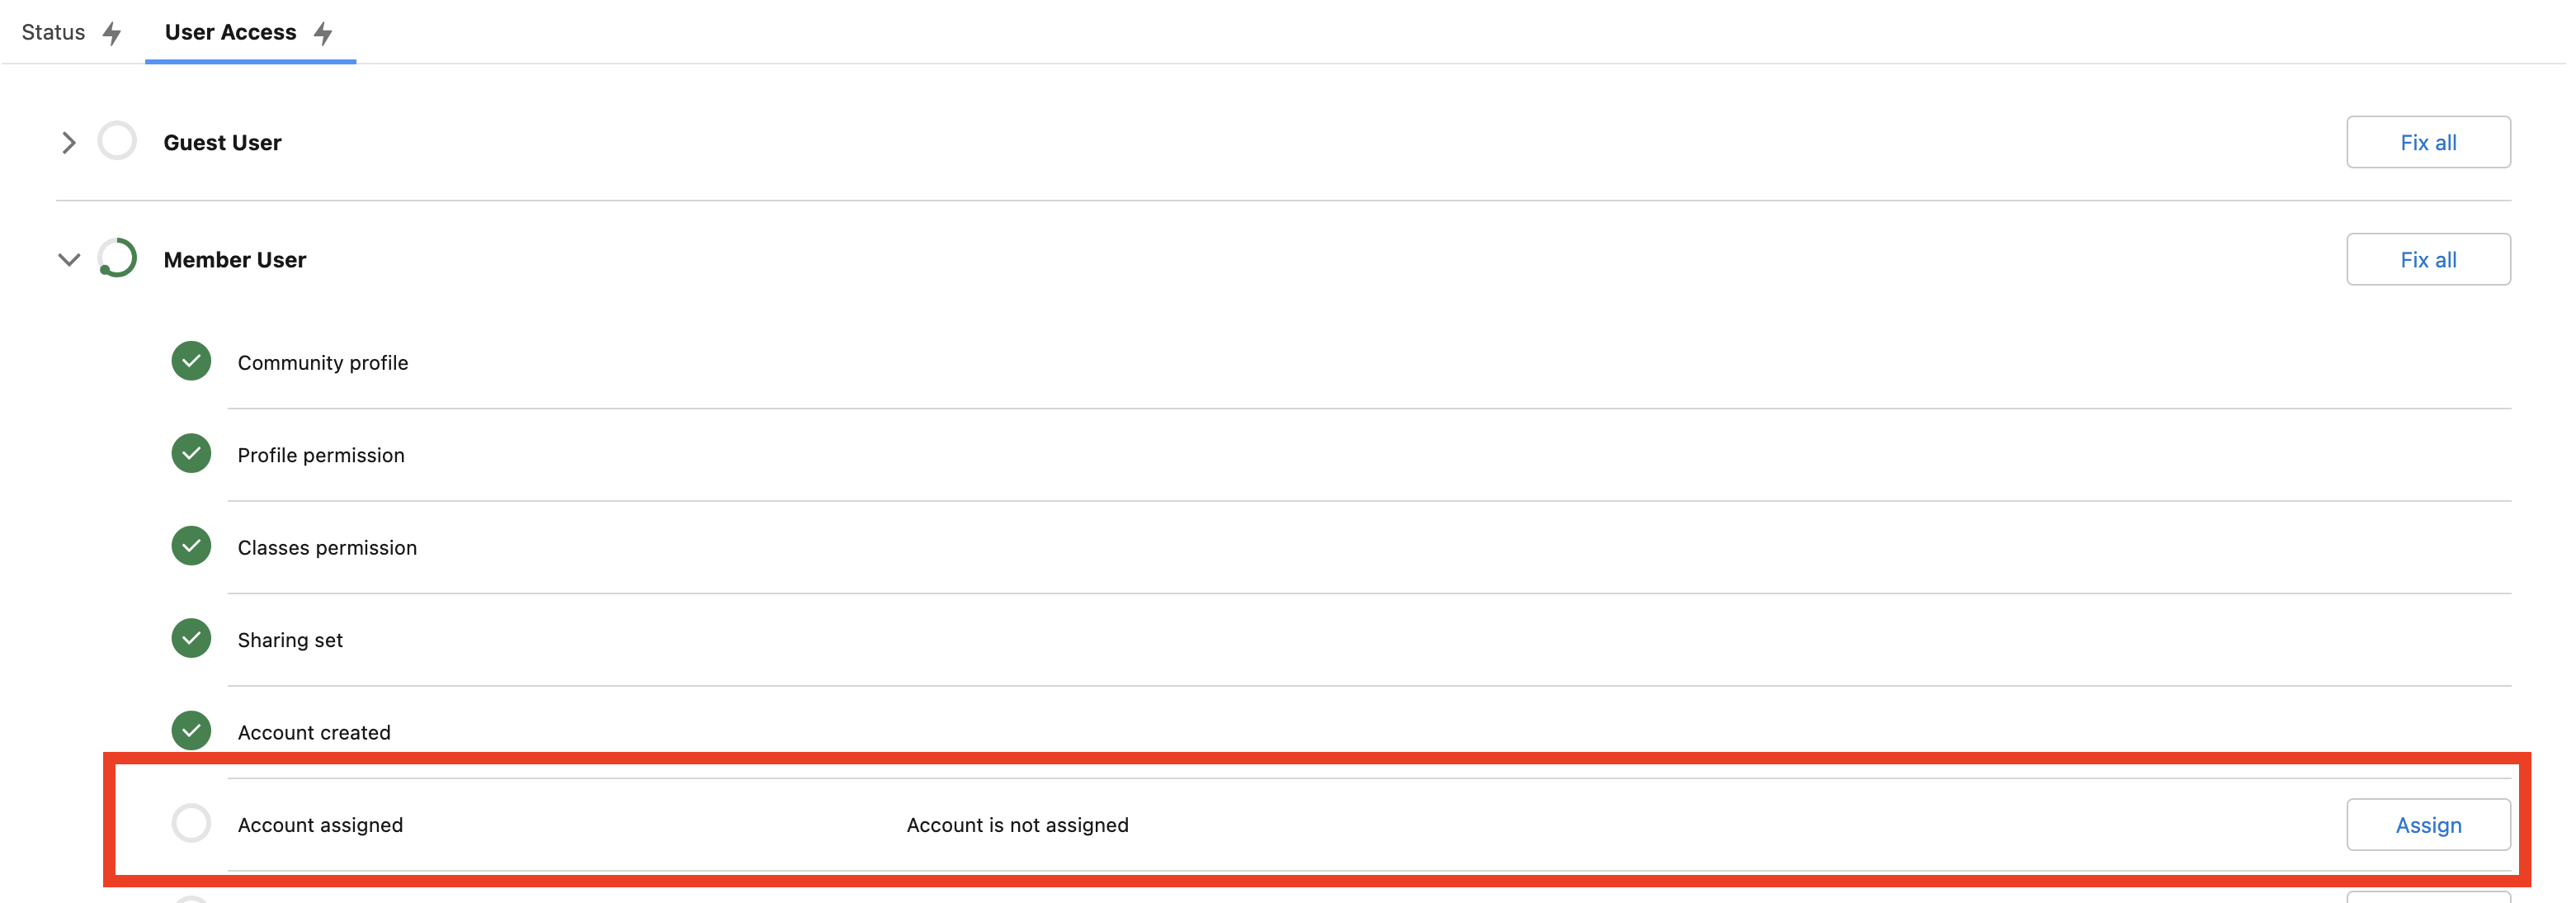
- Go to your community, APP Launcher> API Community Manager Diagnostic>community>User Access> Guest User> Fix All… Member User> Fix All.
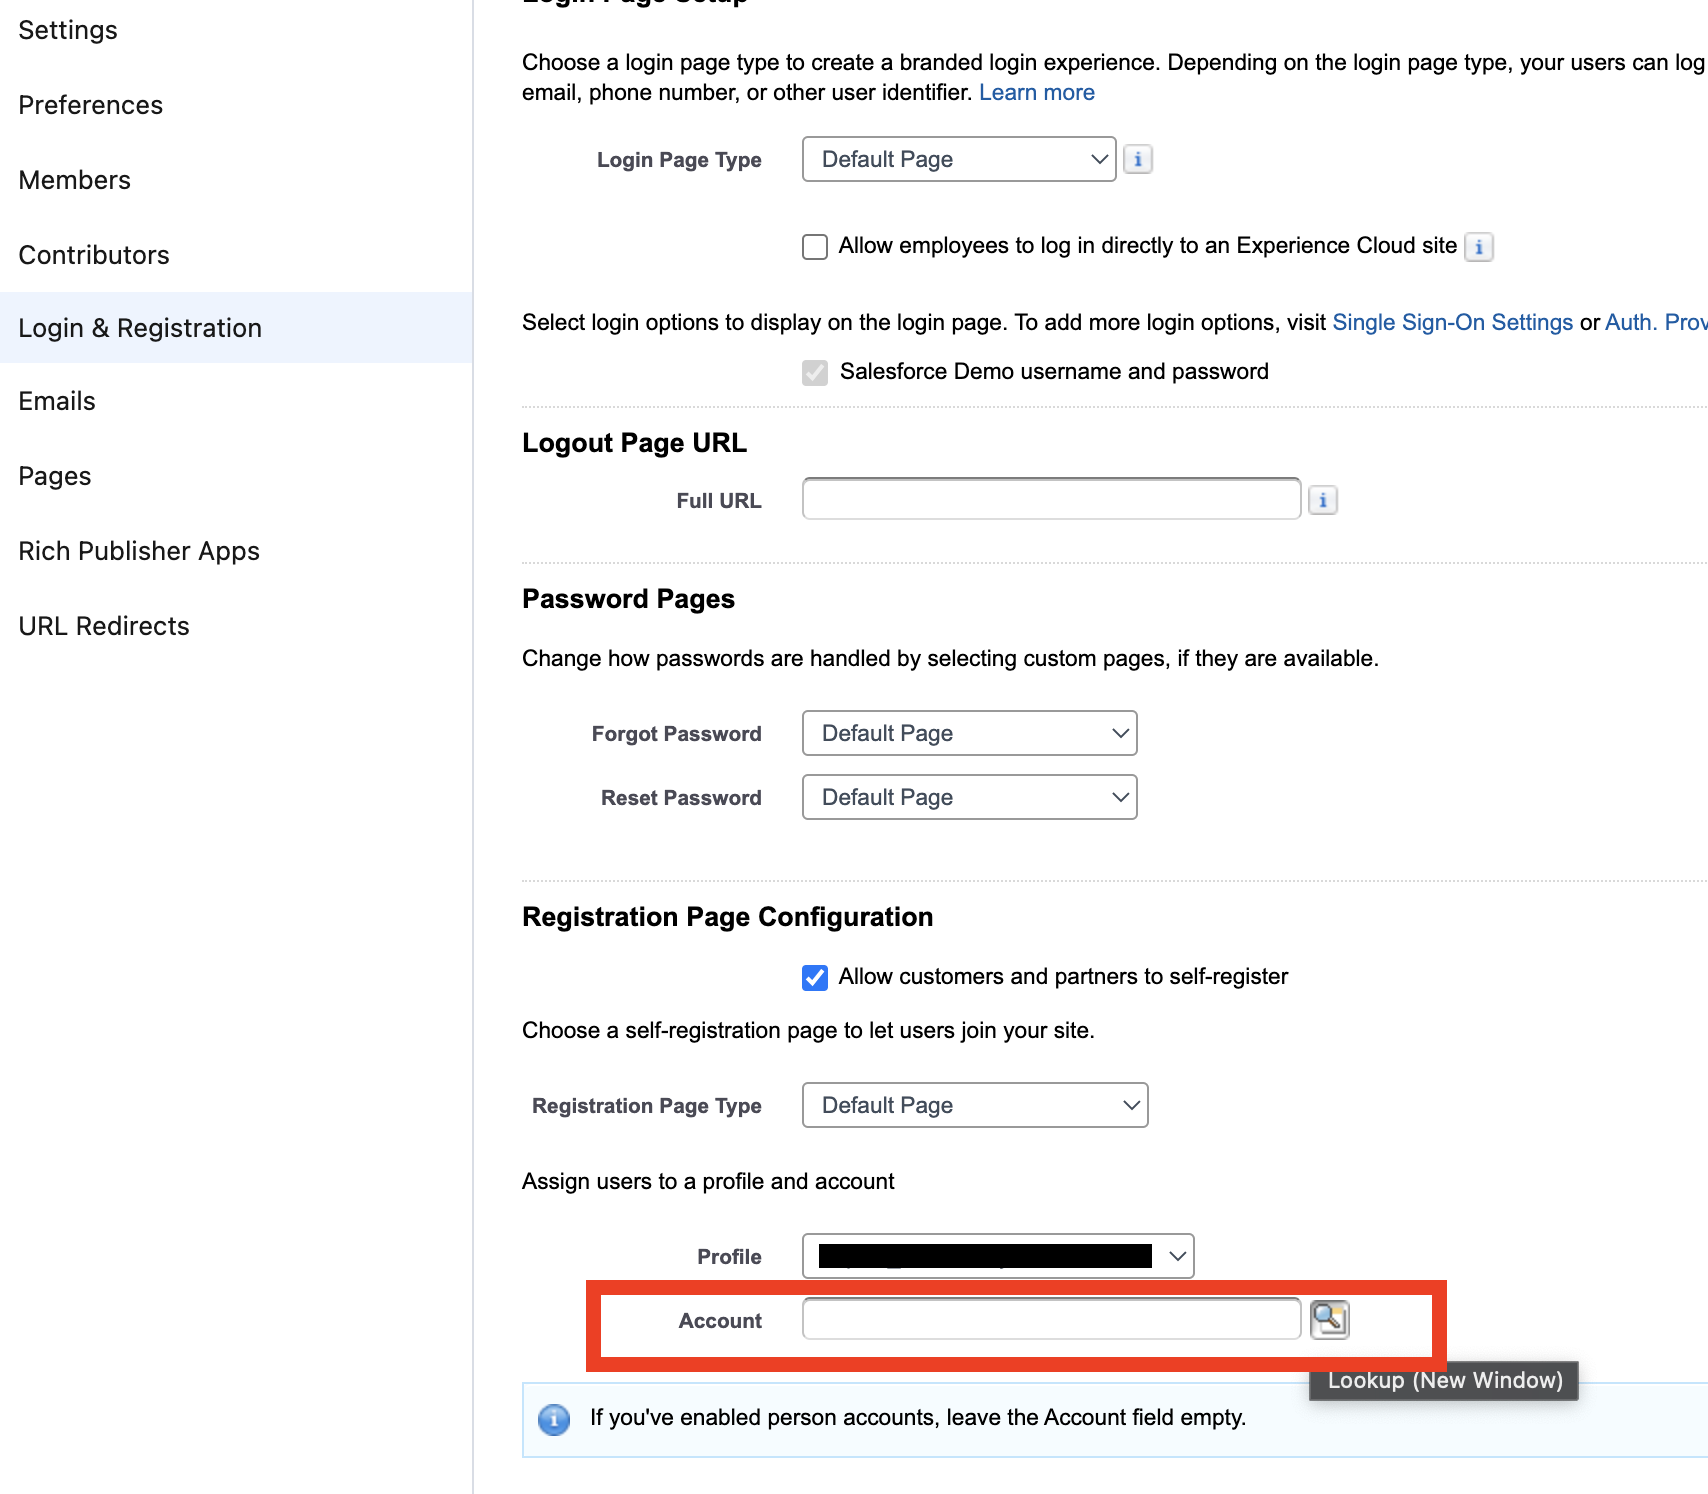
 This required additional steps for Fix all.When a new user registers to ACM. Salesforce needs to assign the user to a profile and an account. To assign click on assign against the Account Assigned.
- Go to Login & Registration. Click on Account.

- Give the name of the account as the name of your community manager. Click on Save.
- Click on Fix all.
Now all the profiles and users has been created.
Activate and Publish Community
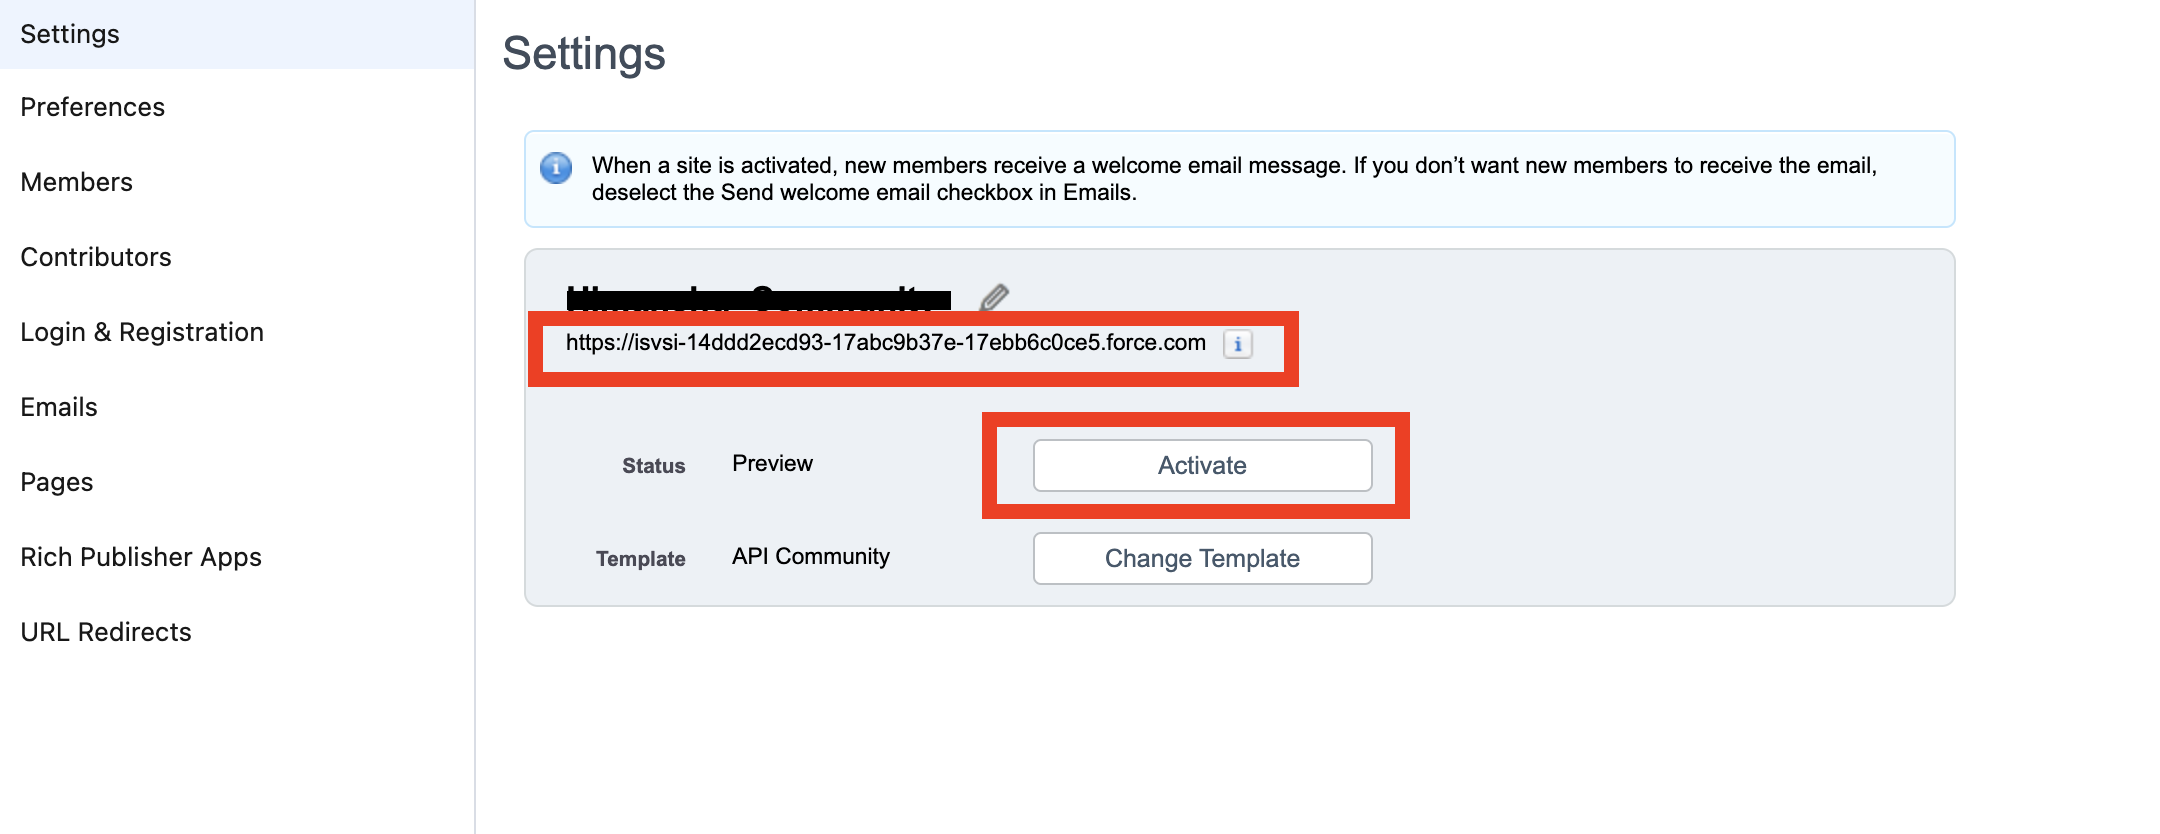
- Go to Community App Launcher> API Community Manager Diagnostic. Click on community>Status> Go to Admin

- Click on Activate and make the note of the URL. It will be used to access the community once it is published

- To publish, Go to Status> Go to Builder

- Click on publish.

- Open the community by clicking the URL.

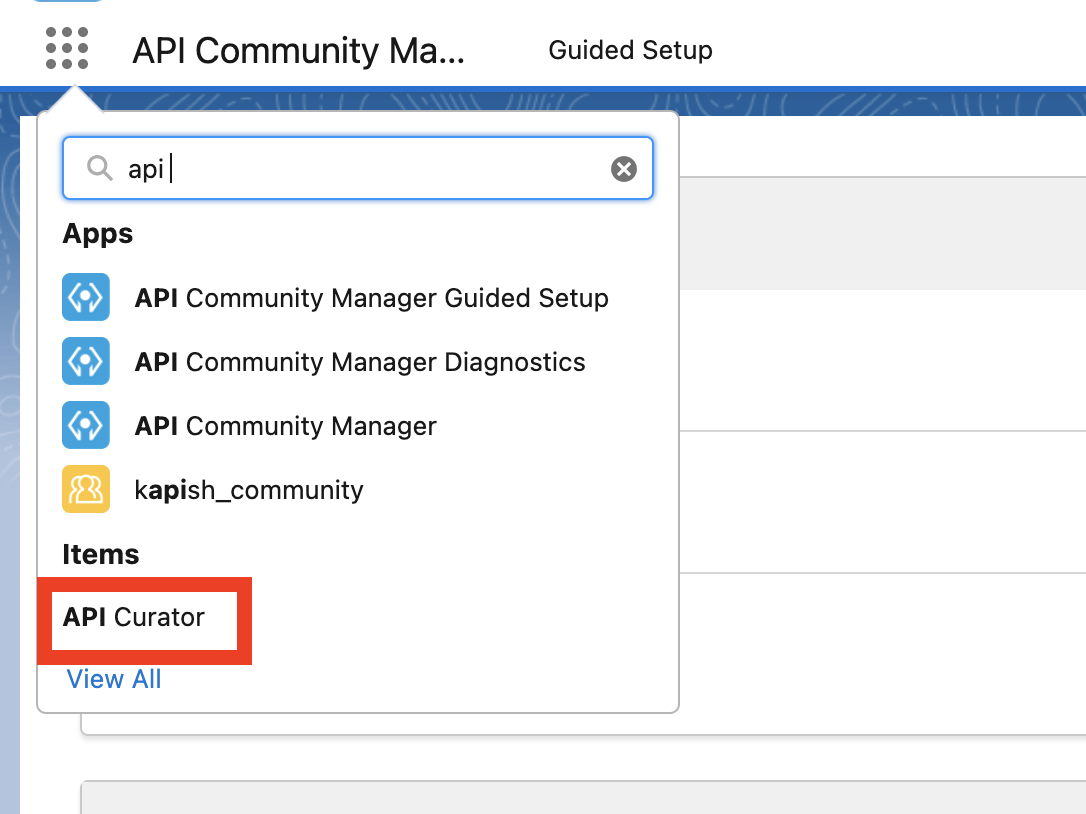
- Click on APP Lanucher> API Curator> choose the community from the dropdown. (All the APIs from Anypoint Exchange-listed here.)

 Choose the API you want to add to your community.
Customize your community according to the business.
